This tutorial was written with general knowledge of Paintshop Pro in mind.
SUPPLIES USED:
PTU Tube 275-1 by Keith Garvey from CDO - Purchase this tube HERE
PTU kit inspired by the tube being used is by Wicked Princess Scraps. You can purchase this kit at CDO - Here
*Please DO NOT use the tube without purchasing and a license. Do not use the kit without purchasing it as well. Thank you!
Template is DD_Template17_Autumn Splendor by Dangerously Delicious Designs. You can find it on her blog HERE
No outside plugins were used.
I'm using Paintshop Pro X9 but any version should work.
*Remember to save your work often!
LET'S BEGIN:
Open the tube and minimize for now.
Open template - SHIFT+D - close original template.
In layer Pallet delete the "info" layer, then select "blue strip" layer.
Selections - Select All - Selections - Float - Selections - Defloat.
Open paper3 - Edit - Copy and close image.
Edit - Paste As New Layer.
Selections - Invert - DELETE key - Selections - Select None.
In layer pallet select "rust strip" layer.
Selections - Select All - Selections - Float - Selections - Defloat.
Open paper4 - Edit - Copy and close image.
Edit - Paste As New Layer.
Selections - Invert - DELETE key - Selections - Select None.
In layer pallet select "recolor leaves" layer.
Adjust - Color - Color Mixer using these settings:
Click OK.
In layer pallet select "overlay leaves" layer
Adjust - Color - Color Mixer using these settings:
Click OK.
In layer pallet select "creme circle" layer.
Selections - Select All - Float - Defloat.
Open paper1 - Copy and close
Edit - Paste As New Layer.
Selections - Invert - DELETE key - Selections - Select None.
In layer pallet select "brown circle" layer.
Selections - Select All - Selections - Float - Selections - Defloat
Open paper6 - Edit - Copy and close.
Edit - Paste As New Layer.
Selections - Invert - DELETE key - Selections - Invert.
Restore tube image.
In layer pallet of tube image select layer 2.
Edit - Copy and minimize as you will use this tube a couple more times.
On template image: Edit - Paste As New Layer.
Using your MOVE TOOL position the tube into the selection as desired (I placed the eye area).
Selections - Invert - DELETE key - Selec
tions - Invert
Effects - Texture Effects - Blinds using these settings:
In layer pallet change the blend mode to Screen.
Selections - Select None.
In layer pallet select "blue circle" layer.
Selections - Select All - Selections - Float - Selections - Defloat.
Open paper3 - Edit - Copy and close image.
Edit - Paste As New Layer.
Selections - Invert - DELETE key - Selections - Invert.
Restore tube image and select "layer1" - Edit - Copy and minimize tube image.
Edit - Paste As New Layer.
Using your move tool position in selection as desired.
Selections - Invert.
Using your eraser tool with default settings erase bottom of tube outside circle.
Selections - Select None.
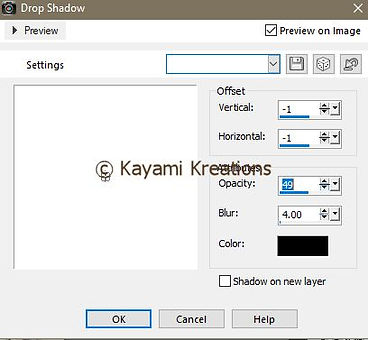
Add dropshadow of choice on new layer and use your eraser tool to erase dropshadow sticking out below bottom of tube if needed.
In layer pallet select "rust circle".
Selections - Select All - Selections - Float - Selections - Defloat.
Open paper2 - Copy and close image.
Edit - Paste As New Layer.
Using move tool position face in selection.
Selections - Invert - DELETE key - Selections - Invert.
Effects - Texture Effects - Blinds using same settings as before.
In layer pallet change blend mode from normal to screen.
Selections - Select None.
In layer pallet select "green strip" layer.
Selections - Select All - Selections - Float - Selections - Defloat.
Open paper5 - Copy and close image.
Edit - Paste As New Layer.
Selections - Invert - DELETE key - Selections - Select None.
Open 3boxes - Edit - Copy - close image.
Edit - Paste As New Layer.
Edit - Resize 35% *uncheck all layers.
Using our move tool position left side of AUTUMN word art.
Add dropshadow of choice (Uncheck seperate layer).
Open pearl box - Edit - Copy and close.
In layer pallet selct the heart box layer.
Edit - Paste As New Layer.
Edit - Resize 35%.
Using move tool position on right side of heart boxes.
Add dropshadow of choice.
Open shoe element - Copy - Close
Edit - Paste As New Layer - Layer - Mirror Horizontal.
Image - Resize 40% and add dropshadow.
Using move tool position on bottom right of SPLENDOR word art.
Open perfume - Copy and close image.
Edit - Paste As New Layer.
Resize 35% - Add dropshadow.
Using move tool position to left side of shoe.
Open flower 2 - Edit - Copy and close image.
Edit - Paste As New Layer
Resize 35% - Add dropshadow.
Duplicate this layer 3 times and position each as desired (see my tag for my choice).
Open flower 1 - Edit - Copy and close image.
Edit - Paste As New Layer.
Resize 35% - Add drpshadow.
Duplicate this layer 4 times and position each along the bottom of the UTUMN word art.
Open butterfly - Edit - Copy and close image.
Edit - Paste As New Layer.
Resize 40% - Add dropshadow and position along one of the flowers at the bottom of the AUTUMN word art.
Open Cat - Edit - Copy and close.
Edit - Paste As New Layer.
Add dropshadow and position along top of blue paper banner.
In layer pallet delete the following layers: AUTUMN \ SPLENDOR BLUE \ SPLENDOR WHITE \ SPLENDOR D/S and BACKGROUND.
Layers - Merge - Merve Visible.
Add Copyright and license information
Layers - Merge - Merge Visible.
Add name/text desired.
Save as .png for transparent background.
Save as .jpg for white background.
Kayami